
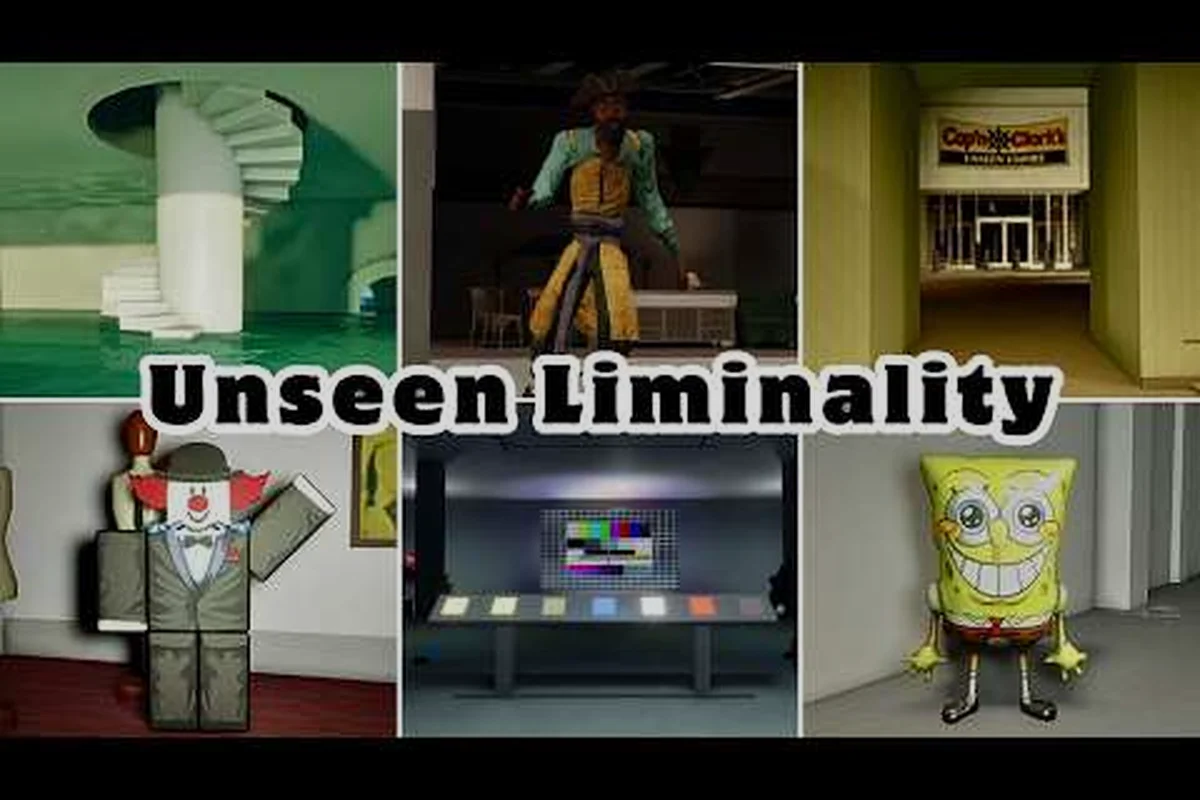
The Unseen Liminality guide 2026 you are about to read is the only starter handbook you need before stepping into the beta's endless hallways. This exploration experience, inspired by Beyond Liminal, drops you into a decaying memory-scape where every corridor looks identical and something scratches behind the drywall. Because the game offers zero hand-holding, most first-time players wander for hours without understanding the core loop, which is why this unseen liminality complete guide focuses on what actually matters: surviving your first session, learning the level order, and recognizing entity dangers before they recognize you.
What makes this unseen liminality starting guide essential is that the beta changes frequently, and community reports suggest the current build rewards cautious exploration over sprinting. You will learn the exact controls, the safest path through each area, and the hidden mechanics that veteran players use to avoid unnecessary deaths. Get the latest survival tactics, entity behavior patterns, and the complete breakdown of every point of interest currently available, so your first run feels confident rather than chaotic.
What to Know Before Your First Session
Before you even load into the lobby, you need to understand that Unseen Liminality punishes players who treat it like a typical Roblox obby. The game is an atmospheric exploration title where the goal is to move through liminal spaces while avoiding entities that react to sound, light, and line of sight. According to the official Unseen Liminality Beta page on Roblox, the developers recommend playing on max graphics settings because visual clarity directly impacts your ability to spot environmental anomalies that signal danger.
The controls are simple but take practice to master under pressure. Here is the complete control scheme you need to memorize before your first run:
-
Q opens the settings menu, which lets you adjust brightness, sensitivity, and audio volume without pausing the game.
-
C triggers a crouch, which reduces the noise you make and makes it harder for sound-based entities to track your position.
-
Left Shift activates sprint, but be warned that sprinting generates significant noise that can attract nearby threats.
-
V enables zoom, allowing you to inspect distant hallways and identify potential hazards before committing to a path.
-
CTRL locks the mouse, which is essential for precise camera control during chase sequences.
The unseen liminality for beginners experience is heavily influenced by audio design, so wearing headphones is not optional—it is a survival requirement. Players who rely on visual cues alone often miss the subtle breathing sounds or floor creaks that precede an entity encounter. Community testing indicates that the game's audio cues have a roughly 15-meter detection radius, meaning you can hear threats approaching before you see them if you keep your volume at a reasonable level.
Your first session should be about exploration, not progression. The beta currently features a lobby area that connects to several distinct zones, and each zone contains collectibles, lore fragments, and hidden rooms that reward thorough investigation. Do not rush through the first area, because the game tracks your exploration efficiency and unlocks bonus content for players who discover a certain percentage of hidden items in each zone.
Core Mechanics and Survival Systems
Understanding the underlying systems is what separates a quick death from a successful expedition. The game operates on a stamina and sanity model that directly influences how entities interact with you, and managing both resources is the foundation of any unseen liminality full guide worth reading.
Stamina Management
Your stamina bar depletes when you sprint, jump, or perform any strenuous action, and it regenerates slowly when you walk or stand still. The critical detail is that stamina regeneration pauses when an entity is within detection range, which means you cannot simply outrun threats indefinitely. You need to break line of sight, hide, and wait for the threat to lose interest before your stamina recovers enough to continue.
| Action | Stamina Cost | Noise Generated | Best Use Case |
|---|---|---|---|
| Walking | 0 per second | Minimal | Default movement, safe exploration |
| Crouching | 0 per second | Almost none | Passing near entity spawn points |
| Sprinting | 15 per second | High | Escaping active chases, crossing open areas |
| Jumping | 10 per jump | Moderate | Clearing obstacles, reaching elevated platforms |
| Vaulting | 20 per vault | High | Quick traversal, emergency escapes |
The table above shows that crouching is your primary survival tool because it costs no stamina and generates almost no noise. Veteran players report that you can crouch-walk past most entities if you maintain a safe distance and avoid direct eye contact. However, crouching slows your movement speed by roughly 40 percent, so you need to balance stealth against the time pressure of certain areas that have environmental hazards.
Sanity and Perception
Your sanity meter depletes when you witness disturbing events, stare at entities for too long, or spend extended periods in darkness. When sanity drops below 30 percent, the game introduces visual hallucinations that can mislead you into walking into traps or toward entity spawns. At zero sanity, your character becomes vulnerable to instant kills from entities that would normally only damage you.
| Sanity Level | Effects | Recommended Action |
|---|---|---|
| 100-70% | Normal perception, clear audio cues | Continue exploration normally |
| 69-40% | Slight visual distortion, occasional whispers | Prioritize finding light sources |
| 39-30% | Hallucinations appear, audio becomes unreliable | Return to safe room or use sanity restoration item |
| 29-0% | Severe hallucinations, entity aggression increases | Immediate retreat, use emergency items |
Restoring sanity requires finding glowing light sources scattered throughout each zone, which appear as flickering lamps or radiant wall panels. Interacting with these sources takes about three seconds and restores roughly 25 percent of your sanity, but the interaction makes noise that can attract nearby entities. According to community reports, the Pool Rooms area has the highest density of light sources, making it a safer zone for players who struggle with sanity management.
Level Order and Area Breakdown
The beta currently features several interconnected areas, and knowing the optimal unseen liminality level order prevents you from wandering into high-difficulty zones before you have the right items and understanding. Based on the full walkthrough video by ItzVexo, the intended progression flows from the relatively safe starting areas into increasingly hostile environments.
The Lobby and First Corridors
Your journey begins in The Lobby, a spacious room with high ceilings, scattered furniture, and multiple hallway entrances. This area serves as a hub, and it contains the game's tutorial messages that explain basic mechanics. The first corridors branching from the lobby are considered safe zones because they contain no aggressive entities, only environmental storytelling and collectible items.
| Area Name | Difficulty | Entity Presence | Key Collectibles |
|---|---|---|---|
| The Lobby | Safe | None | Starter notes, map fragments |
| First Corridors | Safe | None | Lore documents, hidden keys |
| The Pool Rooms | Moderate | 2 entity types | Pool tokens, light sources |
| The Backrooms Section | Hard | 3 entity types | Exit codes, rare items |
| The Wall Interior | Extreme | 4 entity types | Endgame items, lore finale |
The Pool Rooms represent the first real challenge, featuring tiled floors, echoing water sounds, and two distinct entity types that patrol the area. This zone requires careful sound management because the echoing environment amplifies your footsteps, making it easier for entities to detect you from a distance. Players who complete this area successfully gain access to the Backrooms Section, which introduces more complex environmental puzzles.
Hidden Areas and Secret Rooms
Beyond the main progression path, the game hides several secret rooms that contain valuable items and lore fragments. According to the complete overhaul gameplay video by Plus Roblox, these hidden areas are often triggered by interacting with specific environmental objects in a particular order. For example, in the Pool Rooms, touching three distinct tiles that have slightly different coloration unlocks a hidden maintenance corridor containing a rare sanity restoration item that heals 50 percent instead of the standard 25 percent.
The Wall Interior area represents the current endgame content, and it requires players to have collected specific items from earlier zones to progress. This area features the most aggressive entities, and community data suggests that completing this zone unlocks the current beta ending, which sets up the narrative for future updates. If you want to see everything the beta offers, you should follow the complete walkthrough guide that details every area and collectible location in sequence.
Entity Dangers and Avoidance Strategies
Every entity in Unseen Liminality has distinct behavior patterns, and knowing how to identify and avoid each one is the difference between a successful run and a frustrating death. This section covers the entities currently documented in the beta, based on community testing and player reports as of August 2026.
Entity Behavior Comparison
| Entity Name | Detection Method | Speed | Danger Level | Avoidance Strategy |
|---|---|---|---|---|
| The Whisperer | Sound-based | Slow | Moderate | Crouch and stay still when it approaches |
| The Stalker | Line of sight | Medium | High | Break line of sight, hide in closets |
| The Crawler | Vibration-based | Fast | Extreme | Avoid sprinting, use elevated platforms |
| The Watcher | Visual + sanity | Slow | Variable | Avoid eye contact, maintain high sanity |
The Whisperer is the first entity most players encounter, and it patrols the Pool Rooms in a predictable pattern. It detects players through sound, so crouching and moving slowly allows you to slip past it easily. However, if it does detect you, it emits a distinctive whispering sound that grows louder as it approaches, giving you a warning window of roughly five seconds to hide.
The Stalker appears in the Backrooms Section and uses line-of-sight detection, meaning it only reacts when it can see you directly. This entity moves at medium speed but can accelerate dramatically when it locks onto a target. The key strategy is to break line of sight by ducking into side rooms or behind large objects, then wait for the Stalker to lose interest and resume its patrol route.
The Crawler is the most dangerous entity in the current beta, appearing exclusively in the Wall Interior. It detects players through vibration sensors, which means any movement on the floor triggers its attention. The only reliable way to avoid it is to use elevated platforms and metal catwalks that do not transmit vibrations. If you are playing on a team, the entity survival guide explains how to coordinate movements to distract the Crawler while teammates progress.
The Watcher behaves differently from other entities because it does not chase players directly. Instead, it drains your sanity rapidly when you look at it, and if your sanity reaches zero while it is in view, you suffer an instant death. The strategy is to avoid direct eye contact and keep your sanity above 50 percent when you know the Watcher is nearby, because the sanity drain accelerates at lower levels.
First-Time Tips for New Players in 2026
This unseen liminality complete guide would not be complete without practical tips that address the most common mistakes new players make. These recommendations come from analyzing community feedback and player experiences shared across Roblox forums and Discord servers.
Top Survival Tips
-
Always carry a light source item because darkness accelerates sanity drain, and having a portable light source gives you a safety buffer in areas with few environmental lights.
-
Memorize the safe room locations in each area because these rooms provide temporary sanctuary where entities cannot enter, allowing you to restore sanity and plan your next move.
-
Listen for audio cues before entering new areas because the game uses distinct sound patterns to telegraph entity presence, and recognizing these cues prevents surprise encounters.
-
Collect every item you find because even seemingly useless objects can be part of a hidden crafting recipe or unlock a secret area later in the game.
-
Do not sprint through unfamiliar areas because the noise attracts entities, and the visual distortion from fast movement can cause you to miss important environmental details.
Common Mistakes to Avoid
The most frequent cause of death for new players is sprinting through open areas without scouting ahead. While sprinting feels safe in the early corridors, it generates noise that travels further than you might expect, and entities in adjacent rooms will investigate the sound. Instead, walk or crouch through new areas, and only sprint when you have clear visibility of the path ahead.
Another common mistake is ignoring the sanity meter during exploration. Many players focus entirely on avoiding entities and forget that their sanity is slowly draining, especially in darker areas. When hallucinations begin, they often mistake them for real threats and waste stamina running from illusions, which leaves them exhausted when a real entity appears.
Finally, do not rush the level order. The game is designed to be explored methodically, and skipping areas means missing essential items that make later zones manageable. The locations guide provides a detailed map of every area and the items you should collect before progressing, which saves you from backtracking later.
Frequently Asked Questions
What is the best strategy for unseen liminality first time playing?
Start by exploring The Lobby and First Corridors thoroughly to learn the controls and collect starter items. Crouch-walk through new areas to avoid attracting entities, and prioritize finding light sources to maintain your sanity. Do not rush into the Pool Rooms until you feel comfortable with the movement mechanics.
How long does it take to complete the current beta?
According to community reports, a thorough playthrough that explores every area and collects most hidden items takes between four and six hours. Speedrunners can finish the main progression in about 90 minutes, but they miss many collectibles and lore fragments that add depth to the experience.
Can I play Unseen Liminality with friends?
Yes, the game supports multiplayer sessions, and playing with friends significantly reduces the difficulty because you can distract entities while others progress. However, be aware that some entities become more aggressive when multiple players are nearby, so coordination is essential for survival.
What happens when you complete the Wall Interior?
Completing the Wall Interior triggers the current beta ending, which reveals narrative information about the game's world and sets up future content. After the ending, you can continue exploring to find remaining collectibles or start a new run with the knowledge you have gained.
Are there plans for more areas in future updates?
The dev team is actively expanding the beta, with the update log tracking every confirmed addition. Community leaks point to a next area introducing a new entity type and deeper Wall Interior lore—perfect for testing your 2026 guide strategies. Which corridor will you tackle first?