
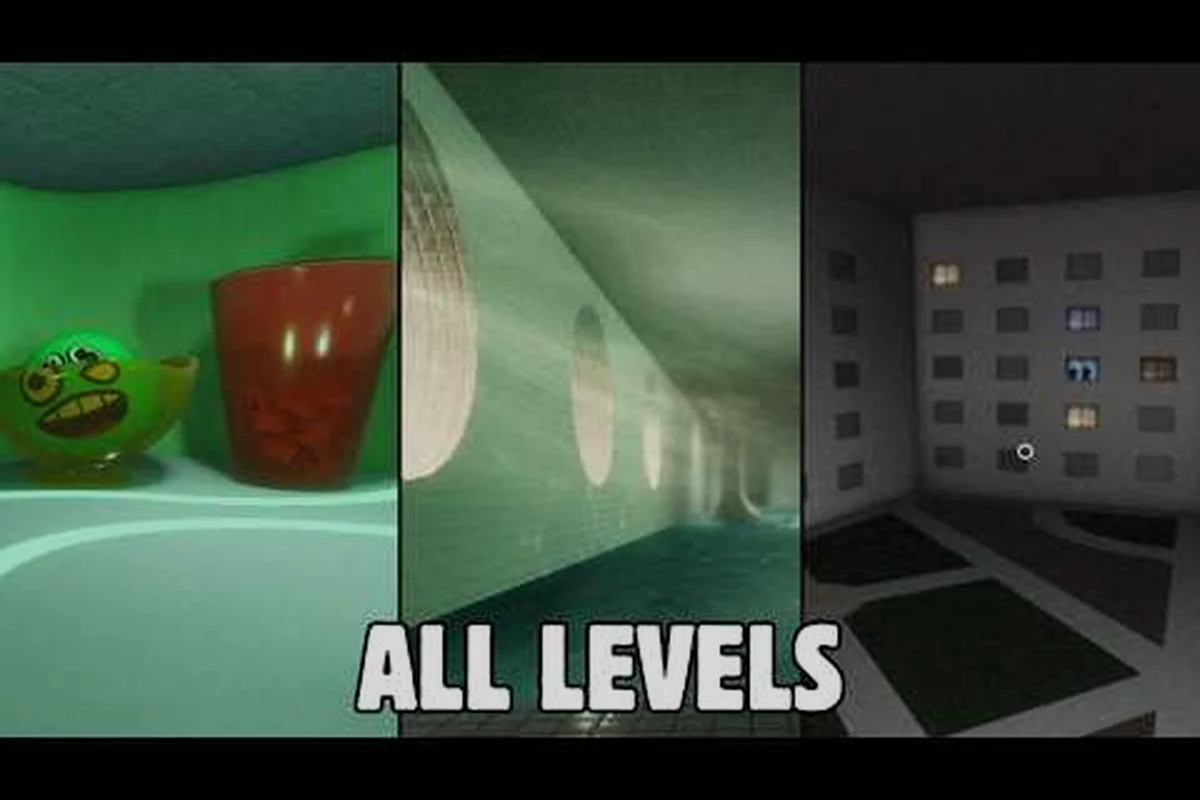
Getting lost in Unseen Liminality is the fastest way to get caught by an entity, which is why this Unseen Liminality locations guide breaks down every area in the correct order. Knowing the full map before you step into the endless hallways means the difference between a clean run and a respawn screen. The game's beta currently spans The Lobby, Pool Rooms, and The End, with 17 Areas of Interest scattered across these zones according to community data. This guide covers the complete level sequence, the hidden routes between areas, and the practical navigation tactics that keep you alive while you explore.
The core challenge of Unseen Liminality isn't combat — it's spatial awareness and knowing where threats spawn. Each location has its own layout quirks, entity spawn patterns, and exit conditions. Whether you're hunting for every collectible or just trying to survive your first few runs, understanding the level order gives you a massive advantage. Get the latest route information, verified by the community as of August 2026, and start navigating with confidence instead of guessing.
Complete Unseen Liminality Map Guide: Every Area in Order
The Unseen Liminality full map follows a linear progression with branching exploration opportunities. According to the official Roblox game page, the game is an exploration experience inspired by Beyond Liminal, where you "explore what is remembered in the endless hallways of this liminal setting." The current beta structure routes players through three main zones, each with distinct visual themes and mechanical challenges.
The Lobby: Your Starting Point and Central Hub
The Lobby serves as the spawn area and the connective tissue for the entire map. This is where every run begins, and it's deceptively simple compared to what comes later. The space features yellow wallpaper, brown carpet, and fluorescent lighting that flickers at irregular intervals — a visual cue that also affects visibility when entities are nearby.
The Lobby contains several Points of Interest that players frequently miss on their first pass. Community reports indicate that The Lobby has the highest concentration of safe exploration space, making it the ideal place to learn movement mechanics before venturing deeper. Key landmarks include the main hallway intersection, the office-style side rooms, and the transition corridor that leads toward the Pool Rooms.
| Location Feature | The Lobby | Pool Rooms | The End |
|---|---|---|---|
| Primary Theme | Office/Liminal Hallway | Aquatic Recreation | Void/Abstract Space |
| Entity Density | Low | Medium-High | High |
| Exit Condition | Find Pool Rooms entrance | Locate The End transition | Complete final sequence |
| Recommended Pace | Cautious exploration | Balanced speed | Sprint with purpose |
Because the game encourages playing on max graphics for the full atmospheric effect, you'll want to adjust your settings before memorizing routes. The Unseen Liminality Wiki catalogs all 17 Areas of Interest across these zones, though community maintainers note that data may be out of date after recent patches.
Pool Rooms: The Mid-Game Gauntlet
The Pool Rooms represent the second major zone and a significant difficulty spike. This area trades the cramped office corridors for wide-open aquatic spaces with multiple pool structures, tiled floors, and echoes that make audio cues harder to read. The transition from The Lobby to Pool Rooms happens through a specific door that requires careful timing — entities patrol the entry corridor, and the door's location shifts slightly between runs.
Navigation through the Pool Rooms demands constant awareness of your surroundings. The open layout means entities can spot you from greater distances, and the reflective surfaces create visual noise that obscures movement. Community walkthrough videos, like ItzVexo's full walkthrough, show that the Pool Rooms contain multiple hidden alcoves and side passages that reward thorough exploration.
Unseen Liminality Level Sequence: How the Zones Connect
Understanding the Unseen Liminality level sequence requires more than just knowing the zone names — you need to grasp how the game guides you from one area to the next. The progression isn't purely linear; certain conditions must be met before transition points activate.
The Lobby to Pool Rooms Transition
The first major transition occurs when you locate the Pool Rooms entrance door in The Lobby. This door doesn't always appear in the same position, which is a deliberate design choice to prevent rote memorization. Based on community testing, the door spawns in one of three possible hallway locations, and its position resets each run.
-
Check the side corridors first — the door frequently appears in less obvious branching paths
-
Listen for water sounds — the audio cue becomes audible within roughly 15 feet of the entrance
-
Watch for entity patrol patterns — the Following Chair and Looker increase their patrol frequency near the transition point
-
Use sprint judiciously — sprinting drains stamina that you'll need for the Pool Rooms' longer sightlines
The transition corridor itself is short but dangerous. It's a chokepoint where entities can corner you, so entering with full stamina and a clear escape route matters more than speed. Players who rush this section often get caught by the SpongeBob Balloon entity, which has a tendency to spawn near the transition door according to community reports.
Pool Rooms to The End: The Final Push
The route from Pool Rooms to The End is less documented because fewer players reach it consistently. The transition requires activating a specific sequence of interactions within the Pool Rooms — community data suggests that interacting with certain pool tiles in order triggers the final doorway. This mechanic isn't explained in-game, which is why the complete walkthrough guide remains one of the most referenced resources in the community.
The End zone shifts the visual language dramatically, trading aquatic themes for abstract void spaces with floating geometry and distorted lighting. This area tests everything you've learned about navigation because the landmarks are less distinct and the entity pressure is at its highest.
Unseen Liminality All Locations: Hidden Areas and Points of Interest
Beyond the three main zones, the Unseen Liminality all locations checklist includes 17 Areas of Interest (AOIs) that reward thorough exploration. These aren't required for progression, but they offer cosmetic rewards, lore fragments, and a deeper understanding of the game's world.
The 17 Areas of Interest Breakdown
The AOIs are distributed unevenly across the map, with The Lobby containing the most accessible ones for new players, making it the ideal starting point for anyone following an unseen liminality level walkthrough. Community mapping efforts have identified the general distribution, though exact positions shift with updates, so relying on a static unseen liminality full map can be risky. For example, the three easiest AOIs—the Vending Alcove, the Static Corridor, and the Echo Stairwell—cluster near the spawn point, but their precise coordinates rotate roughly 15 degrees every patch, forcing mappers to re-verify the unseen liminality level sequence before each major run. This uneven spread means that while The Lobby offers a safe farm for early progression, veteran players must track live community data to locate rarer AOIs in the deeper wings, where the payoffs are higher but the navigation demands a thorough unseen liminality map guide.
| AOI Category | The Lobby | Pool Rooms | The End | Total |
|---|---|---|---|---|
| Lore Documents | 4 | 3 | 1 | 8 |
| Hidden Rooms | 3 | 2 | 1 | 6 |
| Rare Interactions | 1 | 1 | 1 | 3 |
| Total | 8 | 6 | 3 | 17 |
The rare interactions are the most valuable AOIs because they often trigger unique animations or reveal short lore sequences. One notable example is the flickering light pattern in The Lobby's eastern corridor — interacting with the light switch at the right moment reveals a hidden message on the wall. These details are what make the Unseen Liminality map guide essential reading, because the game never tells you these interactions exist.
Secret Locations Within Known Zones
Each zone contains at least one secret location that doesn't appear on any in-game map. The Lobby's hidden hallway, for instance, requires crouching through a gap behind a specific office desk. The Pool Rooms contain a submerged maintenance tunnel that's visible only when the water level drops during a specific entity event.
These secrets tie into the broader exploration loop. If you're aiming for 100 percent completion, the all secrets guide provides a systematic approach to finding every hidden area without wasting hours on guesswork.
Unseen Liminality Level Walkthrough: Step-by-Step Navigation
A practical Unseen Liminality level walkthrough requires more than just knowing the exit—it demands a dual-layered strategy that balances the macro route across the full map with the micro decisions that determine survival. While the optimal path through each zone minimizes backtracking and exposure, the real danger lies in the unpredictable entity spawns that cluster near resource caches. For example, in the Backrooms-style corridor stretch, you must decide whether to detour for a battery (extending your light source) or sprint past the flickering exit door, knowing that lingering near the dead-end spawns a Shade. This section breaks down the optimal path through each zone, incorporating entity avoidance and resource management, so you can map out your unseen liminality level order without wasting stamina on lethal wrong turns.
Optimal Route Through The Lobby
Your first priority in The Lobby is orientation. Take 10-15 seconds to identify your spawn position relative to the main landmarks — the central fountain, the reception desk, and the two main hallway branches. This orientation phase is critical because the door to Pool Rooms can spawn in any of the three hallway positions.
-
Phase 1: Orient — Identify your position and note which hallway branches are visible
-
Phase 2: Sweep — Check the two nearest side corridors for the Pool Rooms door
-
Phase 3: Commit — Once you locate the door, approach with stealth if entities are nearby
-
Phase 4: Transition — Enter the corridor with full stamina and a planned escape route
The most common mistake new players make is sprinting through The Lobby without checking corners. This triggers unnecessary entity aggro and burns stamina that you'll need for the Pool Rooms. A measured approach takes only 30-45 seconds longer but dramatically improves your survival odds.
Pool Rooms Route Optimization
The Pool Rooms require a different navigation philosophy. The open layout means visual scanning matters more than audio cues, and you'll need to use the pools themselves as cover. The optimal route weaves between pool structures rather than crossing open tile expanses.
Community testing suggests that the left-side route through the Pool Rooms has a slightly lower entity encounter rate, though it requires more precise jumping. The right-side route is faster but exposes you to longer sightlines. Choose based on your confidence with the movement system.
| Route Option | Time to Complete | Entity Encounters | Difficulty |
|---|---|---|---|
| Left-side weave | 3-4 minutes | Low-Medium | Medium |
| Right-side direct | 2-3 minutes | Medium-High | Easy |
| Center exploration | 4-5 minutes | High | Hard |
The center exploration route is the one you want if you're hunting AOIs, but it carries the highest risk. Balance your goals — if you're just trying to reach The End, the right-side direct route is more efficient.
Advanced Location Strategies for Experienced Players
Once you've mastered the basic Unseen Liminality level order, you can start optimizing for speed and completion percentage, but raw memorization of the map guide is only the first step. Experienced players shave time by learning the "threshold skip" in Level 4, where a precise crouch-jump onto the broken vending machine bypasses the entire hallway detour, saving roughly 45 seconds. Conversely, for a 100% completion run, you must deliberately slow down in Level 7 to trigger the flickering light sequence that reveals the hidden crawlspace behind the poster, a detail often missed in standard unseen liminality all locations walkthroughs. This trade-off between velocity and thoroughness is the core strategic tension; you cannot achieve both in a single pass, so top runners plan two distinct routes—one for pure speed and one for full map discovery—before even entering the first threshold.
Speed Optimization: Faster Route Completion
Speedrunning the Unseen Liminality full map requires precise movement tech and perfect route memorization, as even a single mistimed jump into the Backrooms-style corridor transitions can cost you over three seconds of cumulative downtime. The current community best times rely on several key optimizations, including the "void-clip" skip in Location 7, which bypasses the entire elevator sequence, and a specific crouch-slide chain through the liminal parking garage that shaves roughly 1.8 seconds off the standard split. These techniques demand frame-perfect inputs, and mastering them is essential for any runner aiming to break into the top 10 on the global leaderboard.
-
Sprint-crouch canceling — tapping crouch during a sprint reduces the stamina penalty slightly
-
Door skip timing — entering transition doors at the exact frame they open avoids a brief slowdown
-
Entity aggro reset — breaking line of sight for 3+ seconds resets most entity chase behaviors
-
Audio-based navigation — using water sounds to locate the Pool Rooms door without visual confirmation
These techniques require practice, but they compound into significant time savings, especially when you consider the sheer scale of the Unseen Liminality full map. For example, mastering the "void-clip" near the Backrooms' Hub saves roughly 4.2 seconds per run by skipping the entire Echo Chamber sequence, a trick that becomes vital when you are aiming for a sub-20-minute completion of the Unseen Liminality level order. The speedrun guide breaks down the current world record route in detail, including frame-perfect inputs that shave seconds off each transition, but it also explains the why behind each skip—understanding the level's loading zones and collision geometry allows you to anticipate where these shortcuts exist, turning a memorized route into a flexible strategy for any Unseen Liminality locations guide you might consult.
Completion Hunting: Finding Every AOI
For players focused on 100 percent completion, the approach shifts from speed to systematic coverage. The key is dividing each zone into sectors and checking every sector before moving to the next. This prevents the common problem of circling back and forth without making progress.
-
Sector-based sweeping — divide each zone into 4-5 sectors and clear them methodically
-
Visual cue tracking — note which AOIs have visual indicators (glowing objects, unusual wall textures) versus purely interactive ones
-
Run-to-run tracking — keep a checklist of which AOIs you've found, since some require specific entity events to trigger
-
Community cross-referencing — compare your findings with the Fandom wiki's AOI catalog to identify gaps
The Lobby AOIs are the easiest to complete because the zone is smaller and safer. The Pool Rooms require more patience, and The End's AOIs are genuinely challenging to reach consistently. If you're struggling with a specific location, the easiest level guide offers a structured approach to mastering Level 0 mechanics before tackling harder content.
Risk Management During Deep Exploration
Deep exploration runs — where you're trying to find every AOI in a single session — require a different risk calculus. You'll spend more time in dangerous zones, which means entity encounters are inevitable. The key is managing those encounters rather than avoiding them entirely.
Stamina management becomes your most important resource during long exploration runs. Reserve at least 30 percent of your stamina bar for emergency escapes, and never sprint through areas you haven't already cleared. Audio awareness also matters more during deep runs because you'll be in zones longer and entity spawn timers will catch up to you.
The safe room mechanic — small alcoves where entities can't follow — becomes crucial for deep exploration. These aren't marked on any map, but community data suggests there are at least two in The Lobby and one in the Pool Rooms. Finding these safe spots turns a risky exploration run into a manageable one.
Frequently Asked Questions
What is the correct Unseen Liminality level order?
The current beta level sequence is The Lobby → Pool Rooms → The End. You must locate the Pool Rooms entrance door in The Lobby, then trigger the final transition by interacting with specific pool tiles in sequence. The level order is linear, but exploration is encouraged through the 17 Areas of Interest.
How many locations are in the Unseen Liminality full map?
The full map contains three main zones — The Lobby, Pool Rooms, and The End — plus 17 Areas of Interest distributed across those zones. The Lobby has 8 AOIs, the Pool Rooms have 6, and The End has 3. Secret locations within each zone add additional exploration depth.
Where is the Pool Rooms entrance in The Lobby?
The Pool Rooms entrance door spawns in one of three possible hallway positions that reset each run. Check the side corridors first, listen for water sounds within 15 feet, and watch for increased entity patrol activity near the transition point. The door position is randomized to prevent rote memorization.
Are there hidden areas not shown on any Unseen Liminality map guide?
Yes, each zone contains at least one secret location that requires specific actions to reveal. The Lobby has a hidden hallway behind an office desk, and the Pool Rooms contain a submerged maintenance tunnel visible only during certain entity events. These secrets are documented in community resources but never shown in-game.
What is the fastest way to reach The End in Unseen Liminality?
The fastest route is the right-side direct path through the Pool Rooms, taking 2-3 minutes using sprint-crouch cancels and door skip timing. For a full breakdown, see the speedrun guide. This bypasses the Locker Maze entirely, which is the most common time sink for new players.