
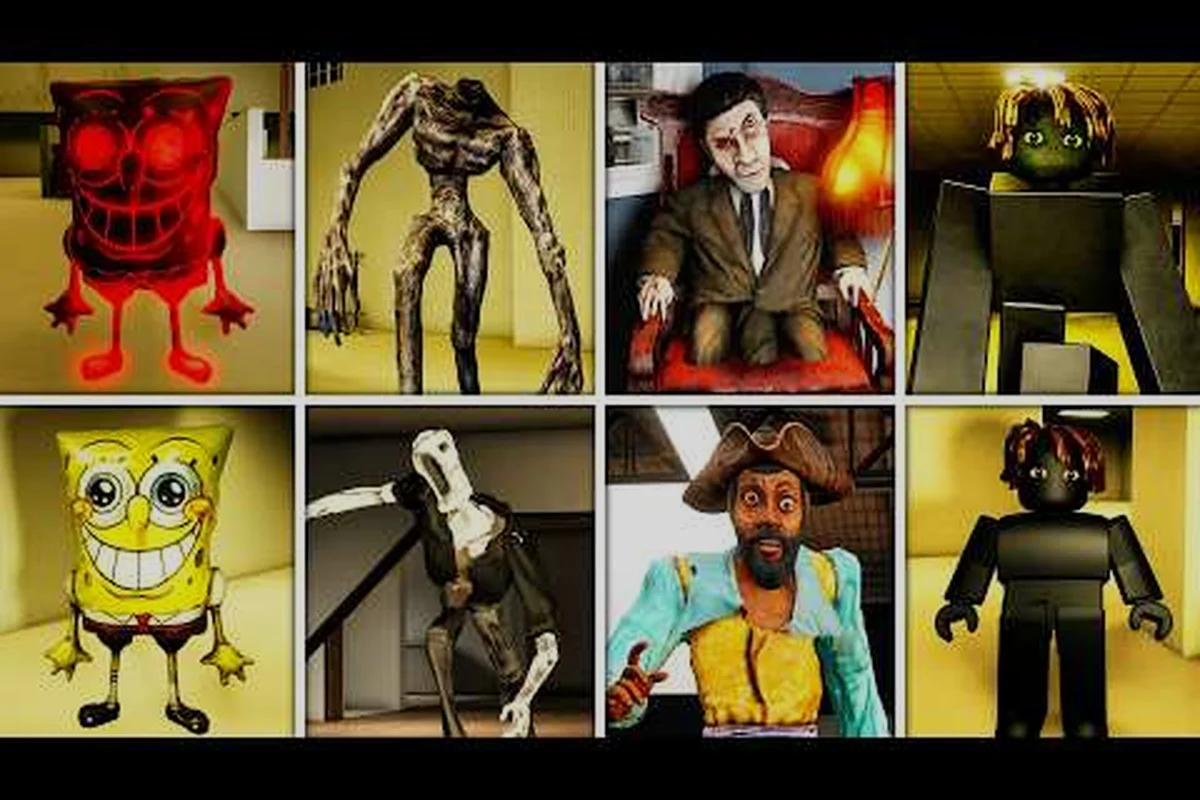
Spawned into a dim hallway with flickering fluorescent lights and no instructions, most new players freeze. That hesitation costs runs. Unseen Liminality drops you into a sprawling liminal space with over 63 million visits and a 93% positive rating, yet the game never explains its core loop. Knowing what to do in Unseen Liminality during those opening minutes separates a quick death from a long, productive exploration session. This guide covers the unseen liminality essentials: movement, stamina, hiding, and objective tracking.
The game launched March 15, 2026, by developer Hev through the verified group The Unseen Zone, which now boasts over 736K members. Because the beta evolves rapidly, the unseen liminality basics you learn today might shift with future patches, but the foundational survival mechanics remain consistent. Let's break down exactly what to prioritize from the moment you load in.
What to Do First: Immediate Survival Checklist
Captain Clark's Office and The Neighborhood
The overhaul added Captain Clark's office as a central hub location, accessible after documenting enough Pool Rooms and library areas. The Neighborhood zone introduces outdoor liminal spaces with Looney Tunes-themed areas that contain unique photography opportunities not found in the endless hallways. Captain Clark himself patrols between his office and the library, requiring careful timing for safe documentation. The Angry Body entity spawns primarily in underground sections beneath The Neighborhood, making these areas high-risk but high-reward for photography progression. Players should prioritize these new zones after mastering the core hiding mechanics, as they offer the most efficient progression per minute.
Your first spawn location is random, but the immediate priorities never change. Before you explore any of the 17 Areas of Interest scattered across the map, you need to establish a survival baseline. The game's official description on Roblox emphasizes exploration of "what is remembered in the endless hallways," which means your first task is learning to move without attracting attention.
Your first 90 seconds inside the Unseen Liminality lobby are non-negotiable: immediately open your inventory and equip the Stamina Stabilizer (the +15% sprint-efficiency module) before the First Shift countdown hits zero, then mark the nearest Hiding Spot on your map—preferably a Vent Locker rather than a standard closet, since it masks your Presence Echo by 40% more against the Watcher patrol route. If you spawn near the Generator Room, prioritize activating the Backup Power first, because a dark map doubles your Detection Radius and turns a routine shift into a guaranteed chase sequence.
-
Open settings with Q to adjust graphics and sensitivity — the game recommends max graphics for the full atmospheric effect, but lower settings improve visibility in dark corridors.
-
Test your controls immediately: C crouches, Left Shift sprints, V zooms, and CTRL locks your mouse. Muscle memory here saves lives.
-
Locate a hiding spot within your first 30 seconds — lockers, under desks, and dark corners all work, but you need to know where they are before an entity appears.
-
Listen for audio cues — footsteps, breathing, and distant humming signal entity proximity. The game's sound design is your primary warning system.
The unseen liminality essentials revolve around one core principle: entities react to sound and visibility. Sprinting through open areas is the fastest way to die. According to community reports on the Unseen Liminality Wiki, entities like the Mimic and Looker track player movement patterns, meaning erratic sprinting draws more attention than steady, quiet walking.
Your first objective is always survival, not exploration. The game features photography-based progression, so you will eventually need to document areas and entities, but a dead player captures nothing. Establish your escape routes, memorize nearby hiding spots, and only then begin investigating your surroundings.
Mastering Stamina Management
Stamina is your most precious resource, and mismanaging it is the number one rookie mistake. The unseen liminality stamina system directly ties into every survival decision you make, because you cannot sprint indefinitely and walking leaves you vulnerable to faster entities.
| Stamina State | Action | Risk Level | Best Use Case |
|---|---|---|---|
| Full (100%) | Sprint | Low | Crossing open areas, escaping active chases |
| Moderate (50-70%) | Jog/Walk | Medium | Standard exploration, hallway navigation |
| Low (20-40%) | Walk only | High | Approaching unknown areas, hiding |
| Exhausted (0%) | Crawl | Critical | Emergency evasion only |
The stamina bar regenerates faster when crouched and stationary, which creates a risk-reward loop: you recover quicker in hiding spots, but you are also vulnerable if discovered. Players report that the regeneration delay lasts roughly three seconds after you stop sprinting, so chain your sprints in short bursts rather than draining the bar completely.
Effective stamina management requires planning your route before you move. When you enter a new area, identify the next hiding spot, sprint to it, recover, then reassess. This stop-and-go pattern feels slow initially, but it is the safest way to traverse the map. Community testing suggests that sprinting for more than five seconds significantly increases entity aggro range, so short bursts are always preferable.
Crouch-walking is slower but nearly silent, making it ideal for passing through areas where you have heard entity activity. The trade-off is time: you will cover less ground, but you will rarely trigger a chase. For new players learning the unseen liminality basics, crouch-walking through unfamiliar territory is the recommended default until you learn entity patrol patterns.
What Hiding Spot Works Against Each Entity Type
Hiding is not a panic button; it is a deliberate tactical choice. The unseen liminality hiding system requires you to understand both your options and the entity behaviors that force you into hiding. Different entities respond to hiding differently, and knowing these distinctions is critical.
Hiding Spot Types and Their Effectiveness
| Hiding Spot | Setup Time | Visibility | Entity Interaction | Notes |
|---|---|---|---|---|
| Lockers | Instant | Low | Most entities check | Standard choice, but predictable |
| Under Desks | Instant | Very Low | Some entities miss | Great for Looker encounters |
| Dark Corners | None | High | Line-of-sight dependent | Works only if entity passes by |
| Closets | 1 second | Low | Most entities check | Slightly better than lockers |
| Behind Furniture | None | Medium | Depends on entity | Requires positioning skill |
The Mimic is particularly dangerous because it can disguise itself as environmental objects, meaning your hiding spot might already be compromised. According to player experiences shared on BloxRant, the Mimic often appears as a chair or mannequin near hiding spots, waiting for players to commit to a hiding animation before striking.
Entity awareness works on a three-tier system: unaware, suspicious, and alerted. Unaware entities follow fixed patrol routes; suspicious entities investigate the last sound they heard; alerted entities actively hunt your position. Hiding breaks line-of-sight and resets suspicion over time, but alerted entities will search nearby hiding spots systematically.
The Still Life entity freezes when observed, which creates an interesting dynamic: you can pass it safely if you maintain eye contact, but looking away triggers an immediate chase. This mechanic rewards careful camera control and makes the zoom function (V key) essential for scouting ahead.
When Hiding Fails
Hiding is not foolproof. Some entities, like the Following Chair, track your last known position and wait nearby, forcing you to either outlast their patience or make a risky break for another spot. The Captain entity patrols specific areas and will open lockers systematically, so hiding in his patrol zone is a death sentence.
Community data suggests that entity behaviors vary by difficulty setting and server population. More players in a server means more noise, which can attract entities to your general area even if you are not the source. This is why solo exploration is often safer for beginners learning the game mechanics.
Essential Tools and Progression Systems
Beyond survival, Unseen Liminality offers progression tools that expand your capabilities. The Marker Tool (99 Robux) and Shove Tool (189 Robux) are paid gamepasses that provide significant advantages, but you can progress without them. The Glowstick Toy (89 Robux) provides light in dark areas, which is useful but not essential.
The photography-based progression system is the game's core loop. You need to capture images of entities, locations, and anomalies to unlock new areas and story content. Each photograph you take consumes a limited resource, so you cannot simply spam the camera button.
| Tool | Cost | Primary Use | Essential? |
|---|---|---|---|
| Camera (default) | Free | Documentation, progression | Yes |
| Marker Tool | 99 Robux | Track locations, mark paths | Recommended |
| Shove Tool | 189 Robux | Push entities, create distance | Situational |
| Glowstick Toy | 89 Robux | Light dark areas | Optional |
| Private Server Admin | 699 Robux | Solo play, controlled environment | For serious players |
The objective system guides your exploration without holding your hand. You receive vague prompts like "find the source of the humming" or "document the pool room," and you must interpret these clues to progress. If you are struggling with specific objectives, our objectives list guide breaks down each mission in detail.
The game's 15 players per server limit means you will rarely encounter large groups, but the entities scale their aggression based on player count. Solo play offers the safest learning environment, while group play introduces coordination challenges that can be rewarding but dangerous.
Turning Area Knowledge Into a Route Advantage
Once you master the basics, you need to understand the map's geography and the entities that inhabit each region. The game features The Lobby, Pool Rooms, and The End as primary levels, plus 17 Areas of Interest that include Captain Clark's office, a library, underground sections, The Neighborhood, and Looney Tunes-themed areas.
| Area | Entity Density | Recommended Approach | Key Loot/Objective |
|---|---|---|---|
| The Lobby | Low | Crouch-walk, observe patrols | Initial objectives, map orientation |
| Pool Rooms | Medium | Use echo to track entities | Photography opportunities |
| The End | High | Sprint between hiding spots | Endgame content, rare entities |
| The Neighborhood | Medium | Stick to building interiors | Story progression, Captain encounters |
| Underground Sections | High | Minimal movement, heavy hiding | Secret areas, lore documents |
The Pool Rooms are particularly dangerous because the open water amplifies sound, making your footsteps audible from greater distances. Players report that crouch-walking through the shallow water reduces noise significantly, but you move at roughly half speed, which creates a trade-off between stealth and speed.
Each area has unique environmental audio cues that telegraph entity presence. The library features pages rustling when the Looker approaches; the Pool Rooms echo with dripping water that intensifies near entities; The Neighborhood has distant television static that signals SpongeBob Balloon proximity. Learning these cues is essential for the unseen liminality basics of survival.
The game's lore system rewards thorough exploration. Hidden documents, photographs, and environmental storytelling pieces unlock additional context about the world and its entities. If you are interested in the deeper narrative, our lore explained guide covers the story in detail, while the forgotten lore deep dive explores the hidden meanings behind the game's cryptic elements.
For players who want to understand how the game has evolved, the update history documents every major change since launch, including the complete overhaul that added Captain Clark's office and the new entity roster.
Practical Tips for Long-Term Survival
The Photography-Based Progression System
The complete overhaul introduced a photography-based progression loop that replaces traditional XP grinding. Instead of killing entities, you earn progression by photographing Points of Interest and documenting entity encounters. Each successful photo of a unique entity like The Mimic or Still Life grants significantly more progress than generic area documentation. The Marker Tool gamepass (99 Robux) adds permanent location markers to your camera, letting you track discovered POIs across the 17 Areas of Interest. The Shove Tool (189 Robux) provides a defensive alternative when photography puts you in dangerous proximity to hostile entities like Captain Clark.
Beyond the immediate survival mechanics, experienced players develop habits that extend their runs significantly. These unseen liminality essentials go beyond the tutorial-level knowledge and into the strategies that separate survivors from victims. For instance, mastering the stamina economy is not just about sprinting between hiding spots; it involves learning the exact recovery delay after a full drain and pre-planning a route that chains a locker, a bed, and a dark corner so you never have to cross an open hallway while exhausted. Veterans also prioritize hiding over running when a monster's aggro sound cue triggers, since breaking line-of-sight inside a closet resets the chase timer far faster than outrunning the entity.
-
Always carry a mental map of three nearby hiding spots — if the first is compromised, you need immediate alternatives without checking your surroundings.
-
Use the zoom function (V) before entering new rooms — spotting entities at range gives you time to plan your approach instead of reacting.
-
Learn entity patrol timings — most entities follow fixed routes with predictable intervals; observing from a safe distance teaches you when to move.
-
Never sprint around corners — the most common death is sprinting directly into an entity's line of sight with no escape route.
-
Manage your camera shots carefully — running out of film during a critical documentation objective forces risky re-exploration.
-
Watch for environmental anomalies — flickering lights, displaced objects, and unusual sounds often signal entity presence before you see anything.
The Shove Tool deserves special mention because it provides an active defense option. When an entity gets too close, a well-timed shove creates enough distance to reach a hiding spot. However, the tool has a cooldown, and using it alerts the entity to your exact position, so it is a last resort rather than a primary strategy.
Solo versus group play changes the dynamic significantly. In groups, you can designate a scout to check areas while others wait in hiding, but coordination failures often lead to multi-player deaths. The game's proximity voice chat adds another layer: talking attracts entities, so groups must communicate through text or pre-arranged signals.
Community testing on the current beta build suggests that entity aggression scales with server population, meaning busier servers require more conservative play. If you are learning the game, consider joining a quieter server or using a private server to practice without constant pressure.
Frequently Asked Questions
What should I do immediately after spawning in Unseen Liminality?
Open settings with Q to adjust your graphics and sensitivity, then test your movement controls. Locate a hiding spot within your first 30 seconds and listen for audio cues that signal entity proximity. Establish your escape routes before exploring, because sprinting through unfamiliar areas is the fastest way to trigger a chase.
How does stamina work in Unseen Liminality?
Stamina regenerates faster when crouched and stationary, with roughly a three-second delay after you stop sprinting. Sprint in short bursts of five seconds or less to avoid increasing entity aggro range. Crouch-walking is slower but nearly silent, making it the safest default movement mode in unfamiliar areas.
Which hiding spots are safest against entities?
Lockers and closets offer the best protection but are checked by most entities. Under desks and behind furniture provide lower visibility but depend on entity line-of-sight. The Mimic can disguise itself near hiding spots, so always verify your hiding location before committing to the hiding animation.
Do I need to buy gamepasses to progress in Unseen Liminality?
No, the default camera is sufficient for progression. The Marker Tool helps track locations, the Shove Tool provides emergency defense, and the Glowstick Toy lights dark areas, but none are required. The photography-based progression system works entirely with the free camera, though gamepasses make certain objectives easier.
How do I avoid the Mimic entity?
The Mimic spawns as a chair or mannequin within 8 meters of your hiding spot, so sweep each room with your flashlight before committing to a locker. If the object's shadow doesn't align with its base, it's hostile. Break line of sight for 3 seconds, then re-check—it won't reposition.