
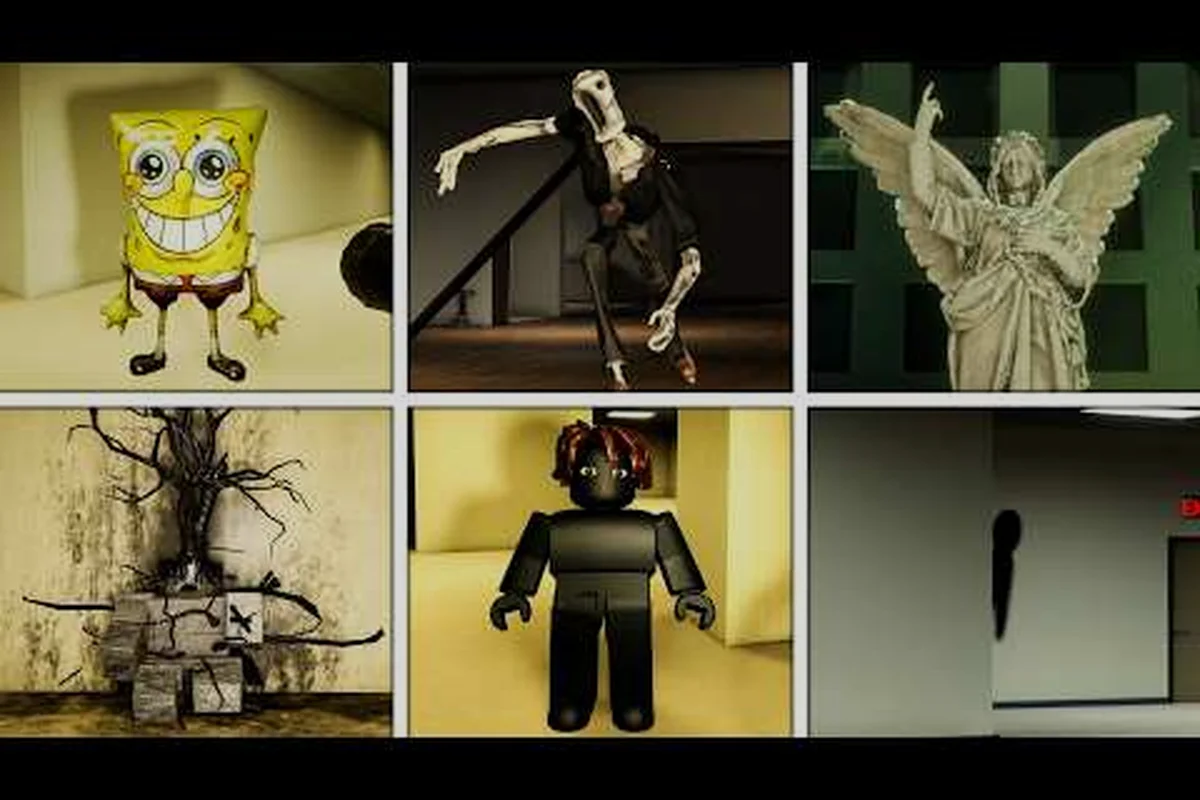
The Unseen Liminality AOI locations guide you are about to read breaks down every one of the 17 Areas of Interest scattered across the game's endless hallways, giving you a clear path to finding all AOI without wasting hours wandering in circles. Because the beta overhaul reworked several spawn points and interactable behaviors, most older videos and wiki entries no longer match what you will actually see in-game, which is exactly why this checklist exists. Get ready to mark off every hidden spot, from the Lobby's subtle anomalies to the Pool Rooms' most deceptive corners, so you can finally complete your collection and understand what lies behind the walls.
Why Tracking Unseen Liminality AOI Locations Matters
The core loop of Unseen Liminality revolves around exploration and discovery, but the game never hands you a map or a counter for the 17 Areas of Interest. According to community data from the Unseen Liminality Wiki, these AOIs are the primary reason players return to the game after finishing the main path, because each one reveals a fragment of lore or unlocks a hidden interaction that changes how you perceive the environment. Without a structured approach to unseen liminality finding all AOI, you will likely miss several interactables that only appear under specific conditions, such as crouching near a wall or sprinting past a certain doorway twice.
The stakes are higher than simple completionism, because some AOIs trigger entity spawns or alter the behavior of creatures like the Mimic and the Looker. Players who rush through the hallways without checking every corner often report that they never encountered certain entities until they deliberately revisited an AOI they had skipped, which suggests that these areas of interest are tied to the game's dynamic difficulty system. By tracking your progress with the checklist below, you can methodically verify each location, note which ones require special actions, and avoid the frustration of backtracking through the entire map because you missed a single interactable early on.
| AOI Cluster | Total AOIs | Difficulty to Reach | Risk Level |
|---|---|---|---|
| The Lobby | 4 | Easy | Low |
| Mid-Hallways | 6 | Moderate | Medium |
| Pool Rooms | 5 | Hard | High |
| The End | 2 | Very Hard | Extreme |
This table gives you a quick overview of where the 17 AOIs are distributed across the current beta build, and the sections below will walk you through each cluster in the order you should tackle them. The difficulty ratings reflect how many entities patrol those zones and whether you need to solve a small puzzle to access the AOI, so use them to plan your route efficiently.
Starting Your AOI Search in The Lobby Area
Your journey through the unseen liminality AOI locations starts in The Lobby, which serves as the game's introductory area and houses four of the 17 interactables. The Lobby's layout is deceptively simple, but the AOIs here teach you the core mechanics you will need for the rest of the game, including how to spot subtle visual anomalies and when to use your crouch ability to reveal hidden markings. Because the beta overhaul changed the lighting system, some AOIs that were previously visible from across the room now require you to stand at a specific angle, so take your time scanning each wall section.
The Flickering Exit Sign
The first AOI most players encounter is the Flickering Exit Sign above the main doorway leading to the hallways. To register this interactable, you need to stand directly beneath the sign and look up for about five seconds while the light stutters through three distinct flicker patterns. Community reports indicate that the sign only counts as an AOI if you observe all three flicker cycles without moving, so resist the urge to sprint past it. Once you complete the observation, you will hear a faint electrical buzz, confirming that the AOI has been logged.
The Reception Desk Note
On the reception desk to your left, you will find a Handwritten Note tucked under the guestbook. This AOI requires you to crouch and approach from the side, because the note is partially hidden behind the monitor. Interacting with it triggers a short text prompt that hints at the game's lore, and it also counts toward your unseen liminality collectibles total. Players who miss this AOI often do so because they approach from the front, where the note is completely obscured by the desk's shadow.
The Frozen Clock
The Broken Clock hangs on the wall behind the reception area, frozen at 3:33. To activate this AOI, you need to walk past it three times without stopping, which causes the clock's hands to twitch slightly on the third pass. This behavior is easy to miss if you are running, so slow down and make three deliberate passes. The clock is one of the few AOIs that does not require a direct interaction, which makes it a common point of confusion for players following older guides.
The Wall Scratch Marks
Finally, the Lobby's fourth AOI is a set of Wall Scratch Marks located near the corner where the carpet meets the tile flooring. These marks are only visible when you crouch and look at the wall from a low angle, and they glow faintly for a split second when you are in the correct position. According to player experiences shared in the community, this AOI is the most frequently missed in the entire game because nothing in the environment hints at its existence. Use your flashlight to sweep the wall slowly, and you will catch the glint.
Mid-Hallway AOIs: The Bulk of Your Unseen Liminality AOI Locations Checklist
Once you leave the Lobby, you enter the endless hallways that make up the bulk of the game's explorable space, and this is where you will find six of the 17 AOIs. These mid-hallway interactables are spread across different sections, and several of them require you to deviate from the main path or perform specific actions like sprinting or crouching at precise moments. Because the hallways use a procedural layout that shifts slightly between sessions, the exact positions of these AOIs can vary, but the conditions for triggering them remain consistent.
| AOI Name | Trigger Condition | Visual Cue | Entity Risk |
|---|---|---|---|
| The Taped Door | Crouch and inspect the gap | Duct tape glows briefly | Low |
| The Radio Static | Stand still for 10 seconds | Radio dial moves | Medium |
| The Mirror Reflection | Walk past twice | Reflection lags behind | High |
| The Ceiling Stain | Look up while sprinting | Stain darkens | Medium |
| The Faded Poster | Shine flashlight at angle | Text becomes readable | Low |
| The Open Locker | Close and reopen three times | Locker creaks loudly | High |
This table summarizes the six mid-hallway AOIs, and the subsections below explain the exact steps for each one. Keep in mind that the entity risk column reflects how likely you are to attract a creature like the Mannequin or the Following Chair while attempting to trigger the AOI, so plan your route to minimize exposure.
The Taped Door Radio Clue
The Taped Door appears on a side hallway that branches off the main corridor, and you will recognize it by the thick strips of duct tape forming an X across the frame. Crouch and move close to the gap between the door and the floor, then wait for the tape to emit a faint glow before interacting. The Radio Static AOI is trickier because it requires you to stand completely still for ten seconds near a small radio sitting on a crate, and any movement resets the timer. Players report that the radio's dial twitches when the AOI registers, so keep your eyes on it while you wait.
The Ceiling Stain Mirror Riddle
The Mirror Reflection is one of the most unsettling AOIs because it involves a full-length mirror mounted on a hallway wall, and you need to walk past it twice to trigger the effect. On the second pass, the reflection lags behind your movement by about half a second, which is your cue to interact. The Ceiling Stain requires you to sprint through a specific hallway section while looking upward, and the stain darkens noticeably when you hit the correct spot. Both of these AOIs have a higher entity risk because they force you to move in unusual patterns, so listen for footsteps before committing.
The Faded Poster and The Open Locker
The Faded Poster hangs on a wall near a dead end, and its text is completely illegible until you shine your flashlight at a sharp angle, which reveals a hidden message that counts as an AOI. The Open Locker is the most interactive of the mid-hallway AOIs because you need to close and reopen it three times, and each cycle produces a louder creak until the locker finally stays open on its own. According to community testing, this AOI sometimes triggers a SpongeBob Balloon spawn, so be ready to run after you complete the interaction.
Pool Rooms AOIs: Advanced Unseen Liminality AOI Locations
The Pool Rooms represent a significant difficulty spike in your unseen liminality AOI hunt, because this area features five interactables that are heavily guarded by entities and require precise timing to reach. The Pool Rooms' layout is more open than the hallways, which means you have fewer places to hide, and the water reflections can obscure visual cues that you would normally spot easily. This section of the map is where most players abandon their completionist run, but the five AOIs here are entirely manageable if you approach them with a clear strategy.
| AOI Name | Location Detail | Required Action | Recommended Timing |
|---|---|---|---|
| The Submerged Tile | Deep end of main pool | Dive and surface three times | After entity passes |
| The Lifeguard Chair | Corner near the shallow end | Climb and sit briefly | When hallway is clear |
| The Chlorine Smell | Center of the room | Crouch and inhale (wait 5s) | Immediately after entering |
| The Drain Cover | Under the diving board | Shine light through the grate | During entity cooldown |
| The Wet Footprints | Leading to the changing rooms | Follow to the end | Before any entity spawns |
The table above gives you a tactical overview of the Pool Rooms AOIs, and the subsections below explain the nuances of each one. The recommended timing column is based on player experiences and reflects the safest windows to attempt each interactable without triggering an entity chase.
The Submerged Tile and The Lifeguard Chair
The Submerged Tile sits at the bottom of the deep end, and you need to dive down and surface three times to register it as an AOI. Each dive reveals a slightly different pattern on the tile, and the third surface triggers a confirmation sound. The Lifeguard Chair requires you to climb up and sit for a few seconds, which feels risky because you are exposed, but the AOI registers quickly and you can drop down immediately. Both of these interactables are best attempted right after an entity passes through the room, because you will have a longer window before the next patrol cycle.
The Chlorine Smell and The Drain Cover
The Chlorine Smell is a purely sensory AOI that requires you to crouch in the center of the room and wait for five seconds while the chemical odor intensifies. This one is easy to miss because nothing visual changes, so rely on the audio cue of a soft hiss to confirm completion. The Drain Cover is located under the diving board, and you need to shine your flashlight through the grate to reveal a hidden symbol. This AOI is particularly dangerous because the crouched position makes you vulnerable to the Looker, so time your attempt carefully.
The Wet Footprints
The final Pool Rooms AOI is a trail of Wet Footprints that leads from the main pool toward the changing rooms. To register this interactable, you must follow the footprints to their endpoint, where they stop abruptly in front of a blank wall. Interacting with the wall at that spot triggers a faint knocking sound, confirming the AOI. According to community reports, this is the only AOI in the Pool Rooms that does not reset if you leave the area, which makes it a good fallback if you need to retreat and regroup.
The End AOIs and Final Tips for Finding All AOI
The final two AOIs in the game are located in The End, a mysterious area that only becomes accessible after you have completed the main path through the Pool Rooms. These two interactables are the hardest to reach because they require you to solve a small environmental puzzle and survive a gauntlet of entity spawns, but they are also the most rewarding in terms of lore. Because The End is a late-game area, you should only attempt these AOIs after you have cleared the previous fifteen, since the game tracks your progress and adjusts entity aggression based on how many AOIs you have collected.
| AOI Name | Puzzle Element | Entity Encounter | Reward |
|---|---|---|---|
| The Static Doorway | Align three glowing symbols | Mimic spawns after interaction | Lore fragment |
| The Final Note | Read all previous notes | Looker appears on exit | Secret badge hint |
The Static Doorway requires you to align three glowing symbols on a nearby wall by interacting with them in the correct order, which is hinted at by the notes you collected earlier in the game. Once the symbols align, the doorway flickers and you can interact with it to register the AOI, but a Mimic will spawn immediately afterward, so be ready to sprint. The Final Note appears on a pedestal in the center of The End, and reading it triggers a Looker spawn on your way out, which means you need to memorize the exit route before you interact.
For players who want to streamline their unseen liminality finding all AOI process, the most effective strategy is to tackle the areas in the order presented here and use the tables as a quick reference. Always crouch when you are unsure about a location, because several AOIs only appear at low angles, and keep your flashlight on at all times to catch subtle glints. If you get stuck on a specific interactable, watching a full walkthrough video by Plus Roblox can help you visualize the exact positioning, since the visual cues are often easier to spot in motion than in static screenshots.
You should also check our complete secrets guide for a broader look at hidden mechanics, and our AOI list breakdown if you want a more compact reference for the 17 areas of interest. For players who want to understand how these AOIs connect to the game's level structure, the locations guide provides additional context on how the hallways generate and why certain AOIs appear where they do.
Frequently Asked Questions
How many AOIs are there in Unseen Liminality?
There are currently 17 Areas of Interest in the beta build, distributed across The Lobby, the mid-hallways, the Pool Rooms, and The End. This number may change with future updates, so check the community wiki for the most current count.
Do AOIs reset if I leave the area?
Most AOIs do reset when you leave the area, which means you will need to re-trigger them if you retreat. The only exception is the Wet Footprints AOI in the Pool Rooms, which stays active even if you leave and return.
Can I find all AOIs in one playthrough?
Yes, you can find all 17 AOIs in a single playthrough, but you need to be methodical about your route. The game does not lock you out of any AOI permanently, so you can always backtrack to collect missed interactables.
Do AOIs affect entity spawns?
According to community testing, collecting certain AOIs does influence entity spawns, tied to the game’s dynamic difficulty. In Unseen Liminality, grabbing the keycard near the broken elevator often triggers extra shadowlings in the next hallway, so plan your route accordingly.
What happens when I collect all 17 AOIs?
Collecting all 17 AOIs in Unseen Liminality triggers a hidden cutscene—a flickering corridor that loops your collected locations into a single map, hinting at an unreleased backrooms-style zone. Dataminers found unused audio tied to it, so the ending likely teases a future expansion.